Archive

bathroom

The pictured Ceramic tiled bath with a shower over was installed eight years prior at a house in the Cheshire town of Handforth. They had cleaned it regularly, but the client was not able to remove all the stains from the grout along with the soap scum which was present on both the tiles and the bath.
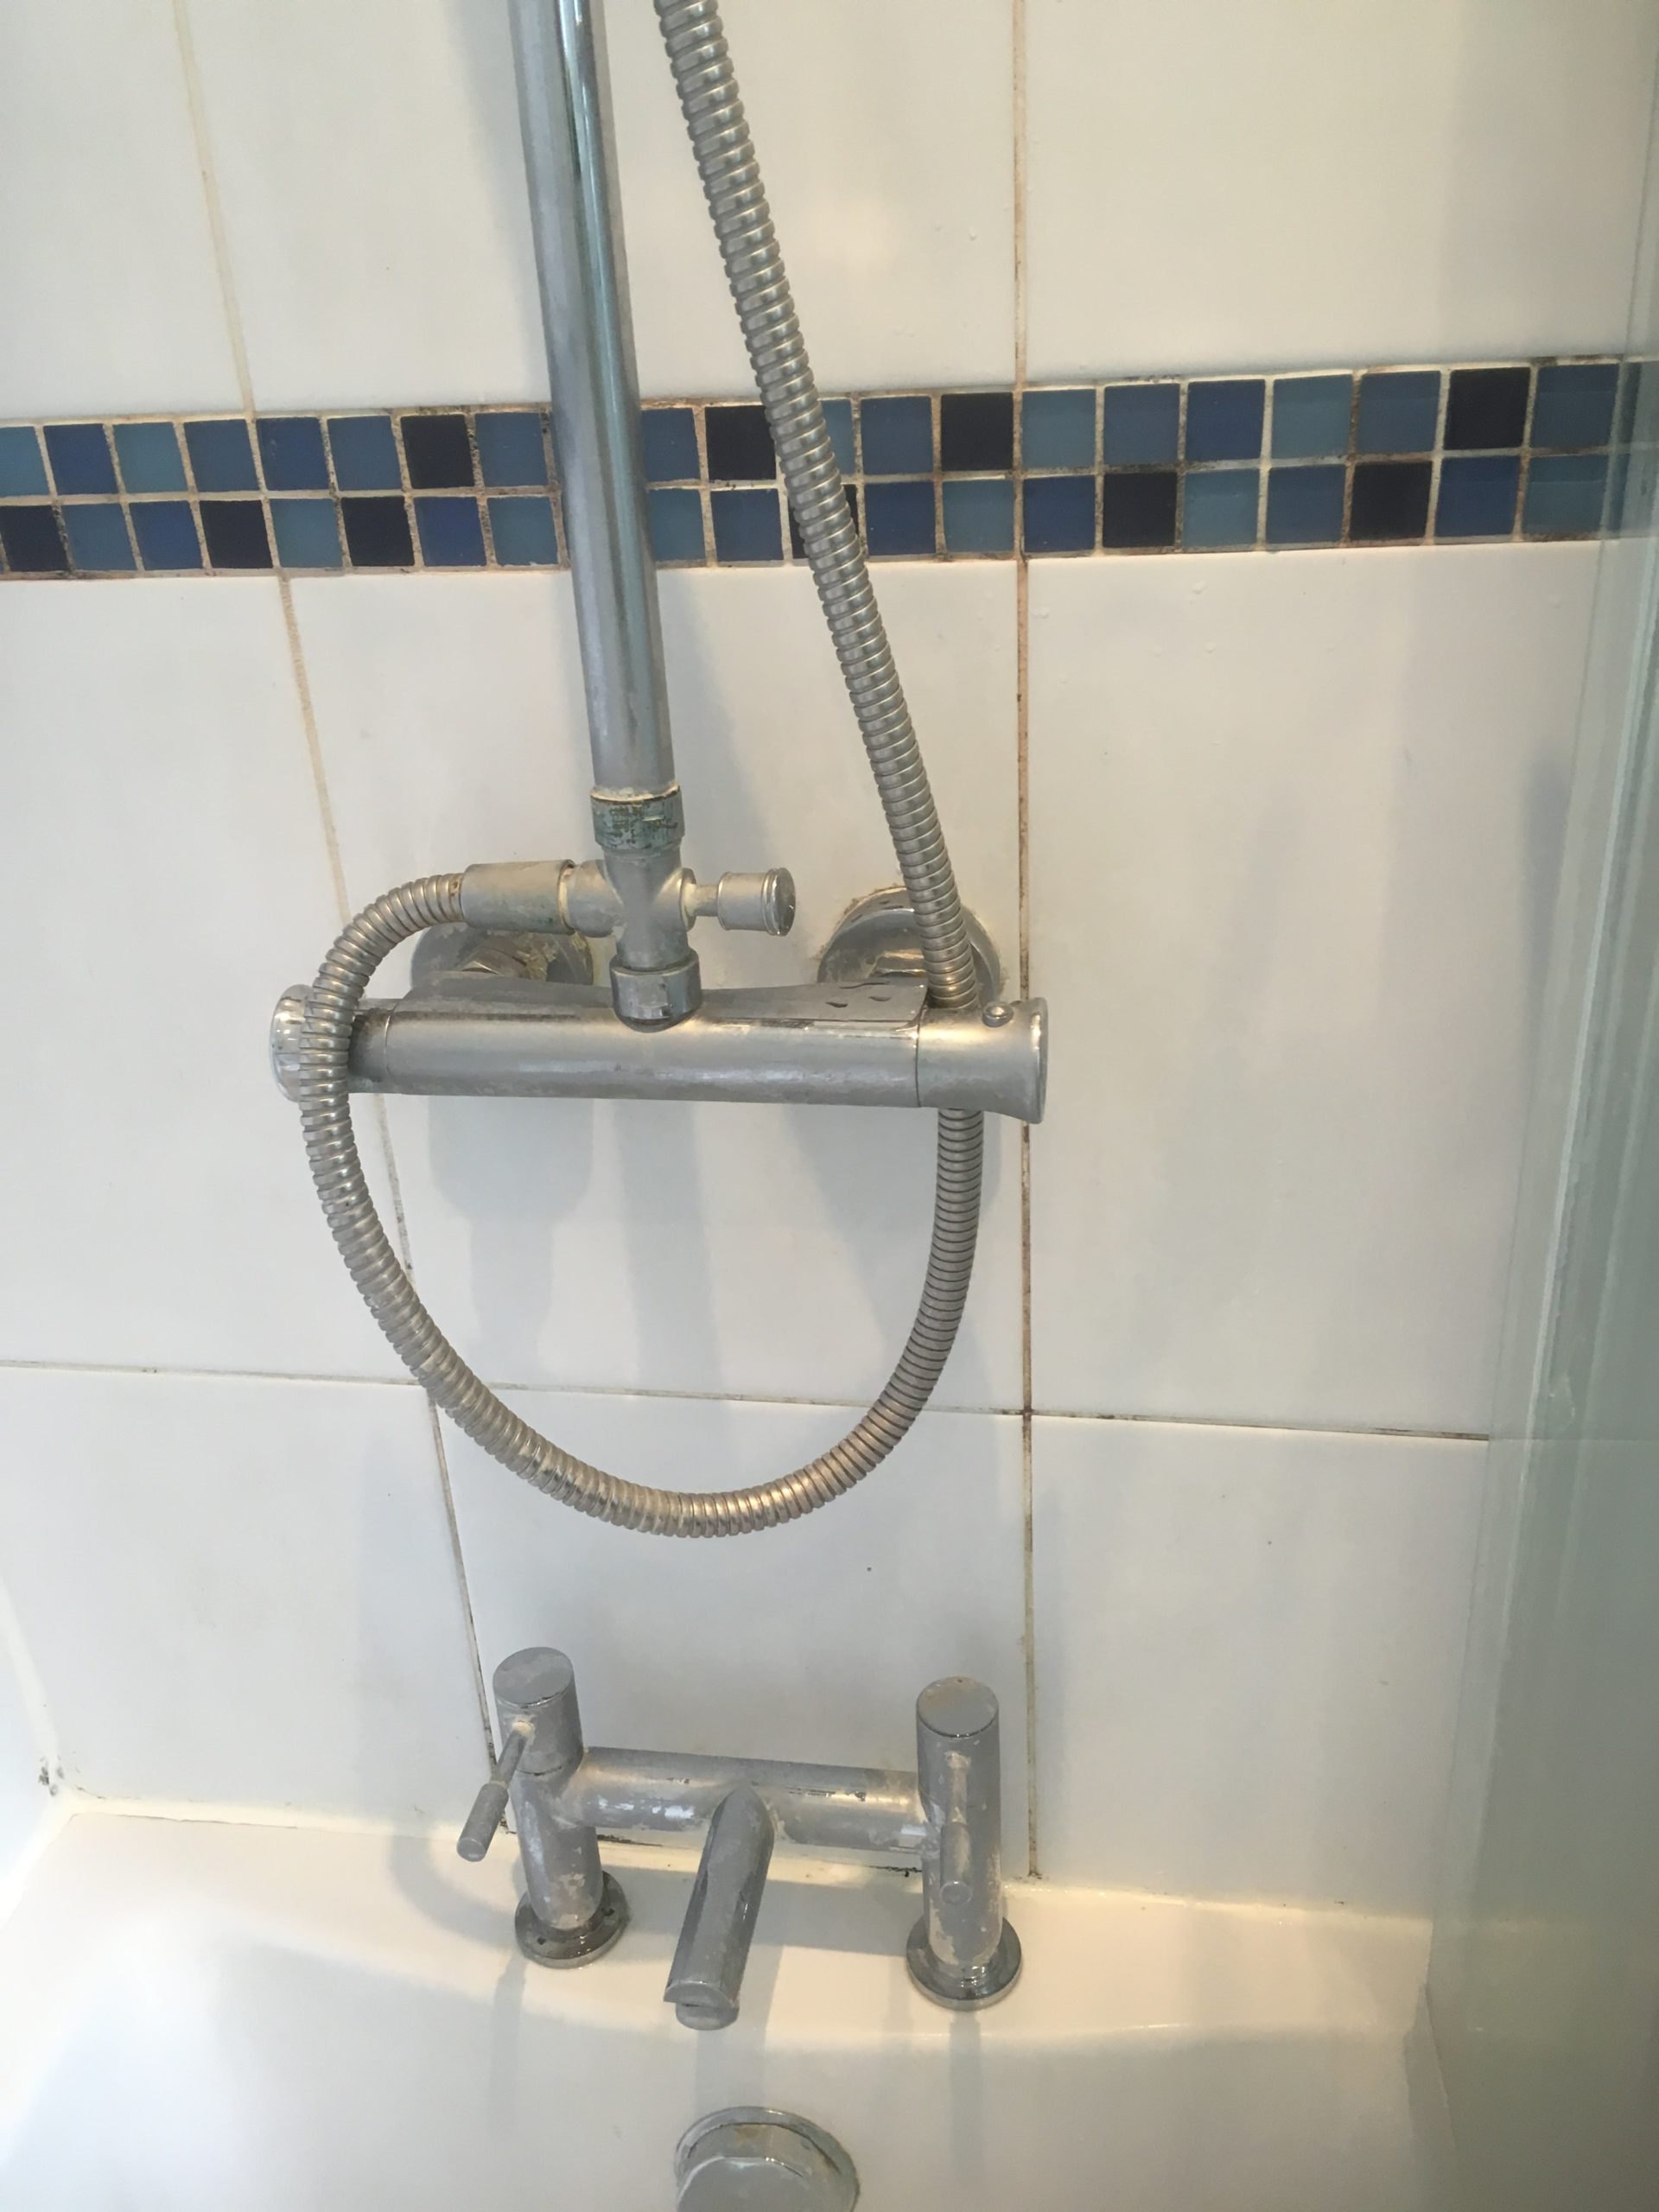
Bathroom Shower Tile Before Cleaning Handforth

Despite their best efforts with all varieties of household cleaner, the bathroom looked dirty and uninviting, the grout was getting discoloured in some places and there was lots of soap residue and limescale on the bathtub and taps.

I visited site and discussed with them the process, I was very confident that we could get the bathroom clean again without too much trouble and within one day. They were happy to go ahead with my quote and we arranged a mutually convenient time to return.

Cleaning a Ceramic Tiled Bathroom Shower

To get the tiles clean I used a combination of Tile Doctor Duo Clean on the grout and then a strong dilution of Tile Doctor Remove and Go on the soap scum, this product also draws out ingrained stains and removes heavy grease build-up. With some help from a professional steamer that had a grout attachment I was able to give the area a very deep clean

The soap scum was particularly difficult to remove but the combination of Tile Doctor Remove and Go, the steamer and lots of elbow grease we got the job done.
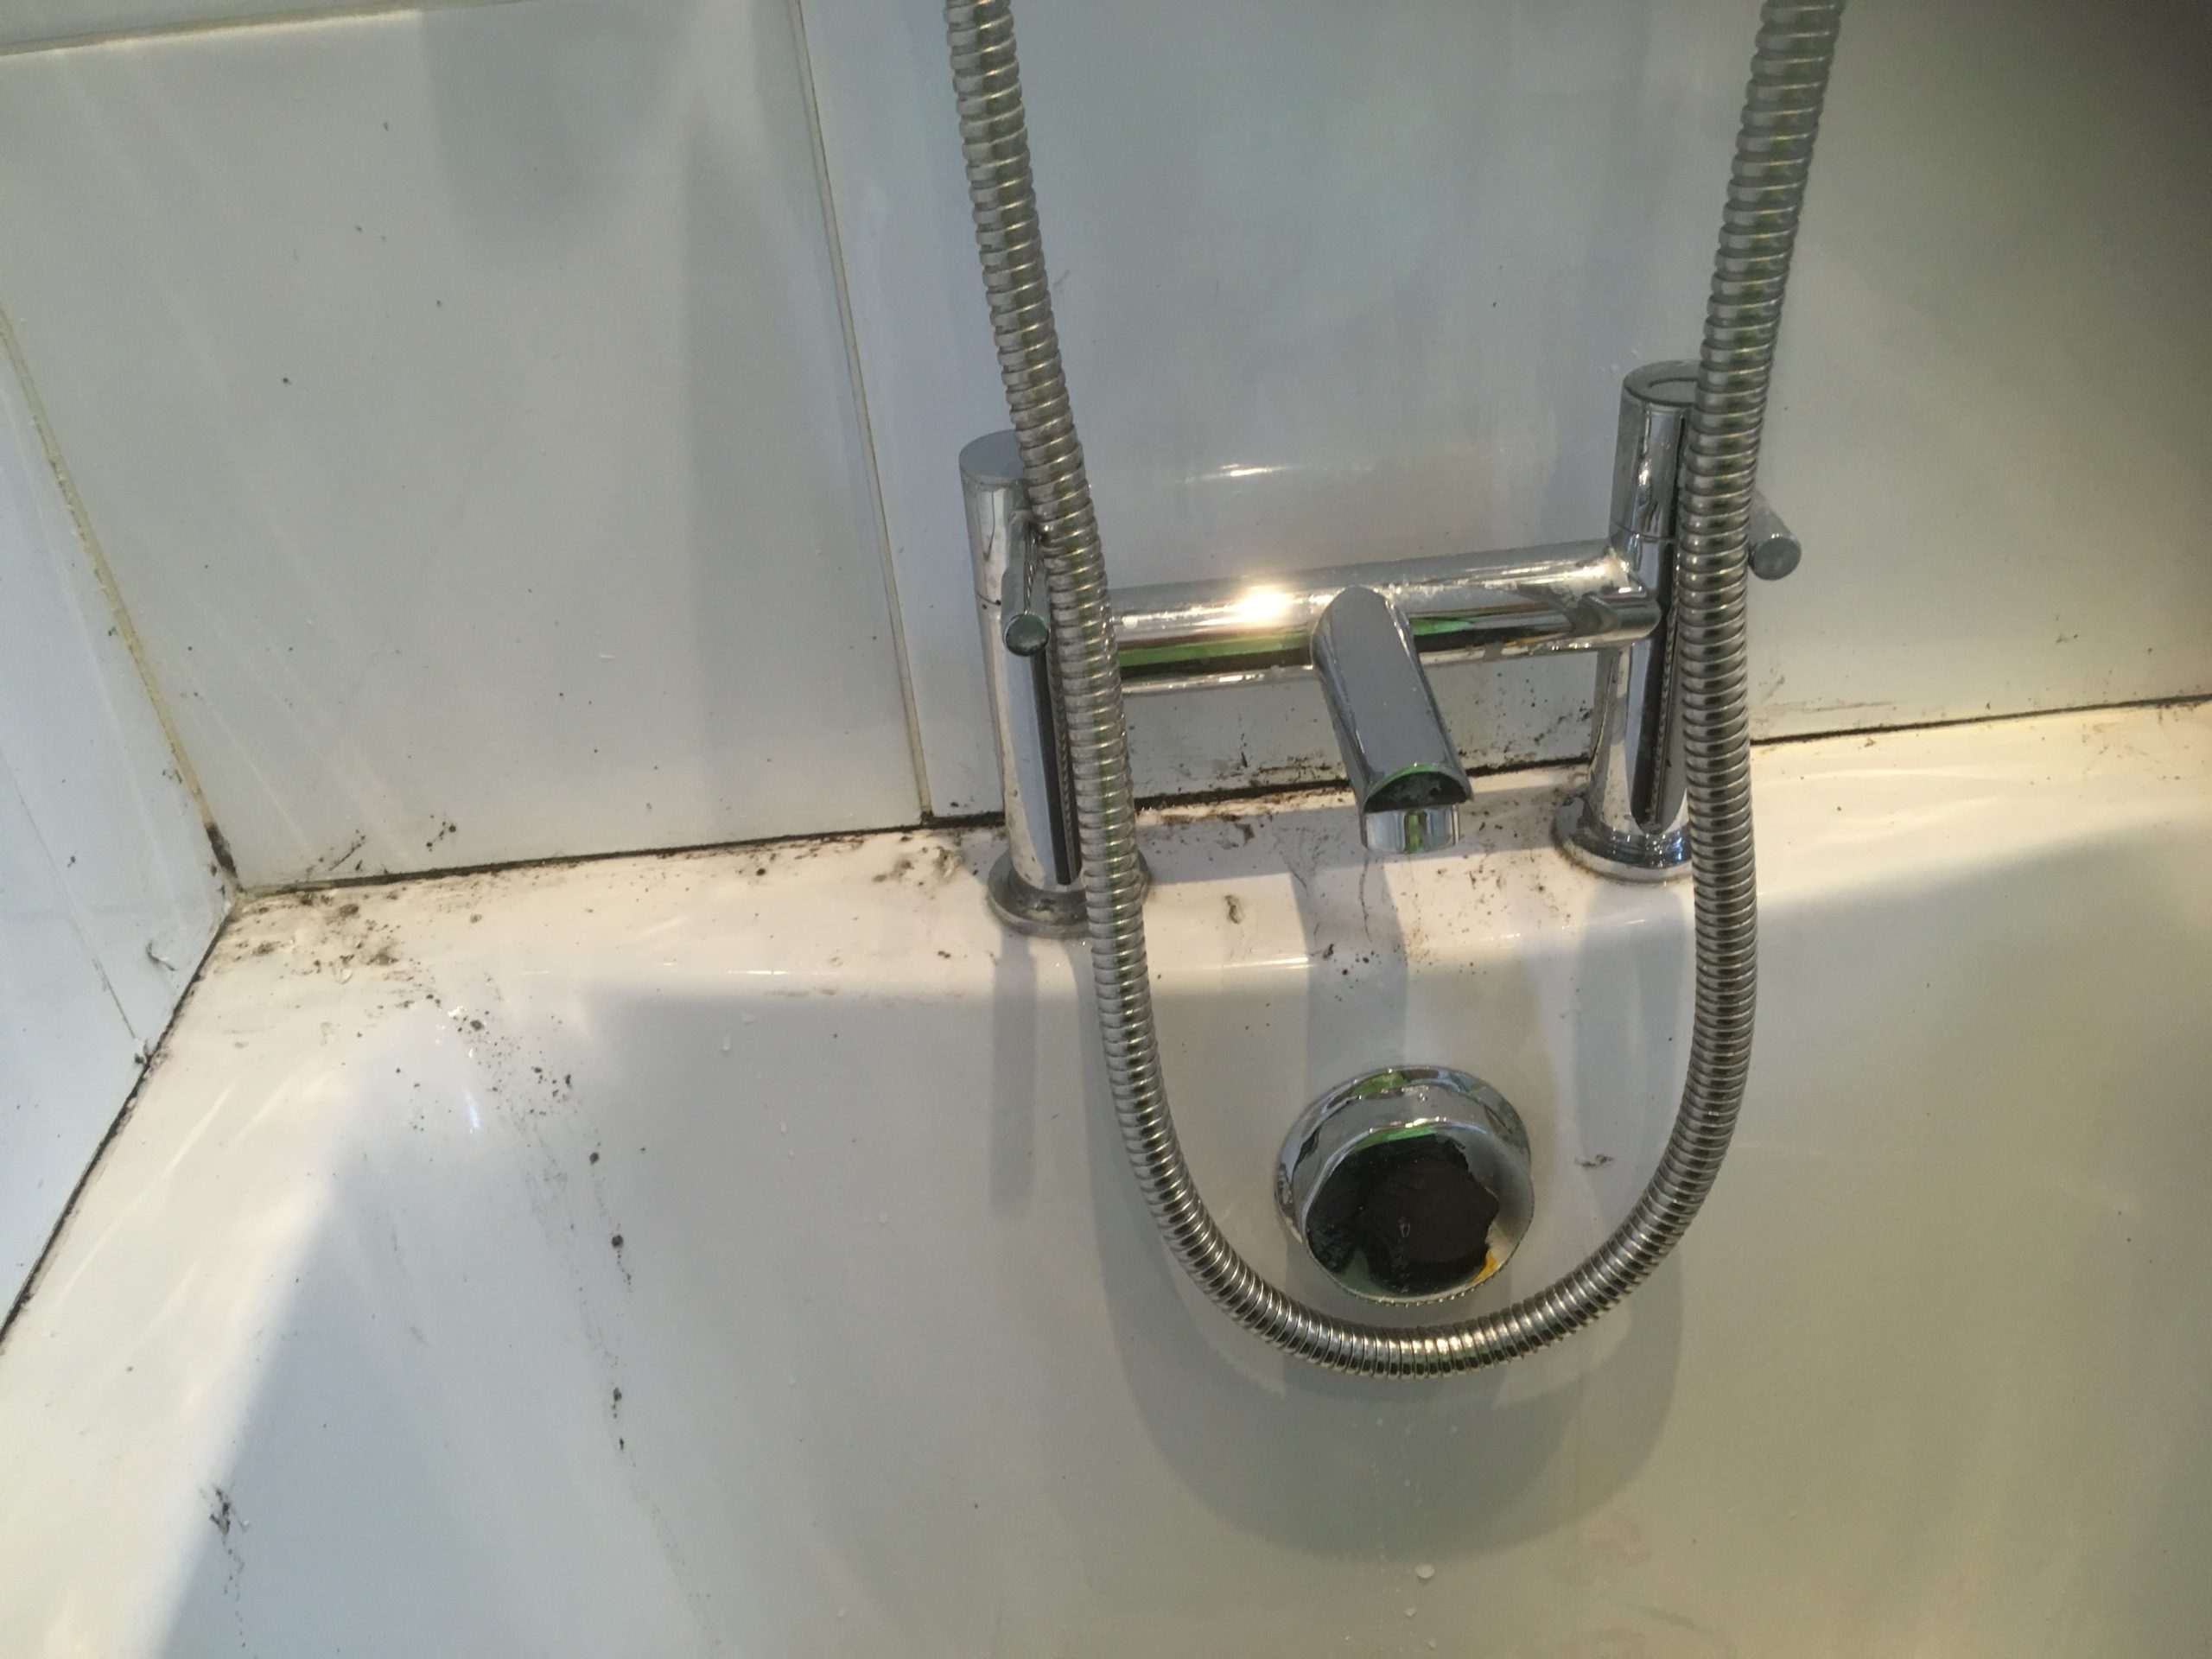
Bathroom Shower Tile During Cleaning Handforth

Sealing a Ceramic Tiled Bathroom Shower Floor

Although Ceramic tiles are factory sealed, after cleaning I dried the tile and grout with a heat gun and then sealed with Tile Doctor Wall Tile Aerosol Sealer. This would ensure the grout was sealed and it also ensures that water runs straight off the tile.

The last step was to strip out the old silicone sealant that ran around between the bathtub and the tiles and replace with new in white.
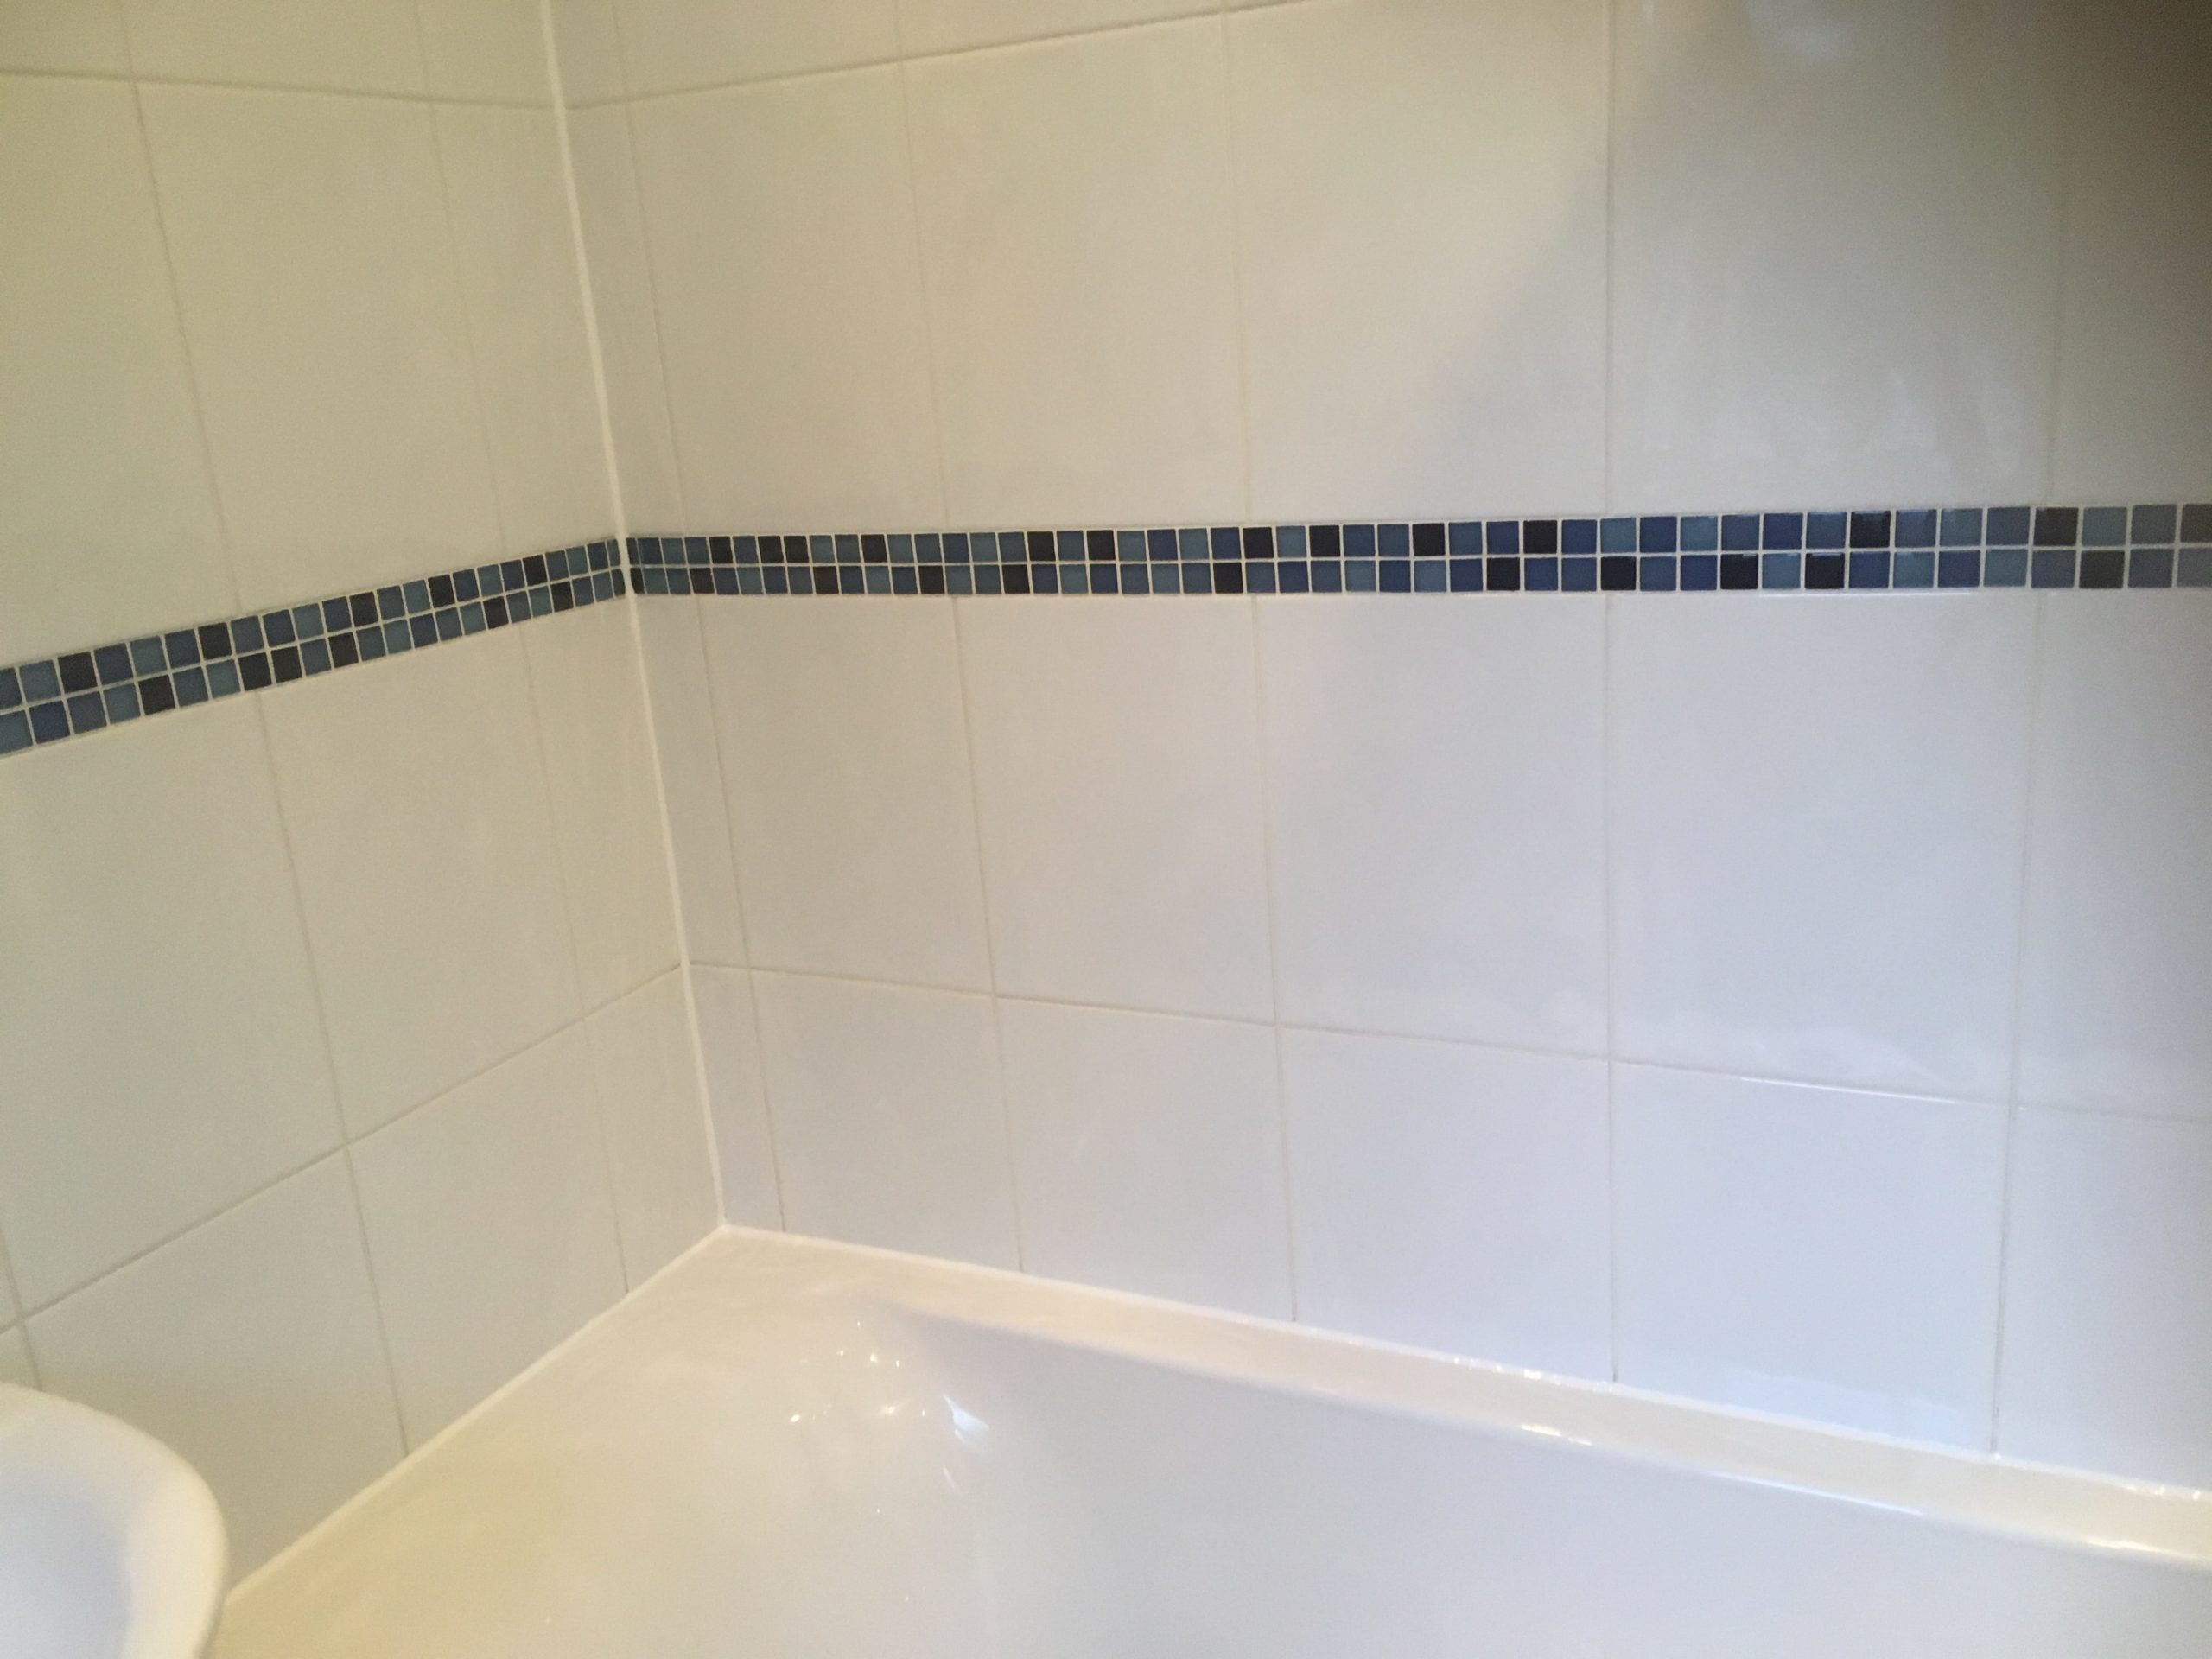
Bathroom Shower Tile After Cleaning Handforth

The work was completed in less than a day and the customer was very happy with their revamped bathroom. It now looked a lot more inviting and more like it had when it was installed. I also suggested they should use Tile Doctor Aqua Pro to maintain the tile and grout going forward, its designed for cleaning bathroom tile and will help prevent the build-up much more effectively than the household cleaners they had been using previously. It also has a fresh lemon scent which leaves the room smelling clean and fresh.
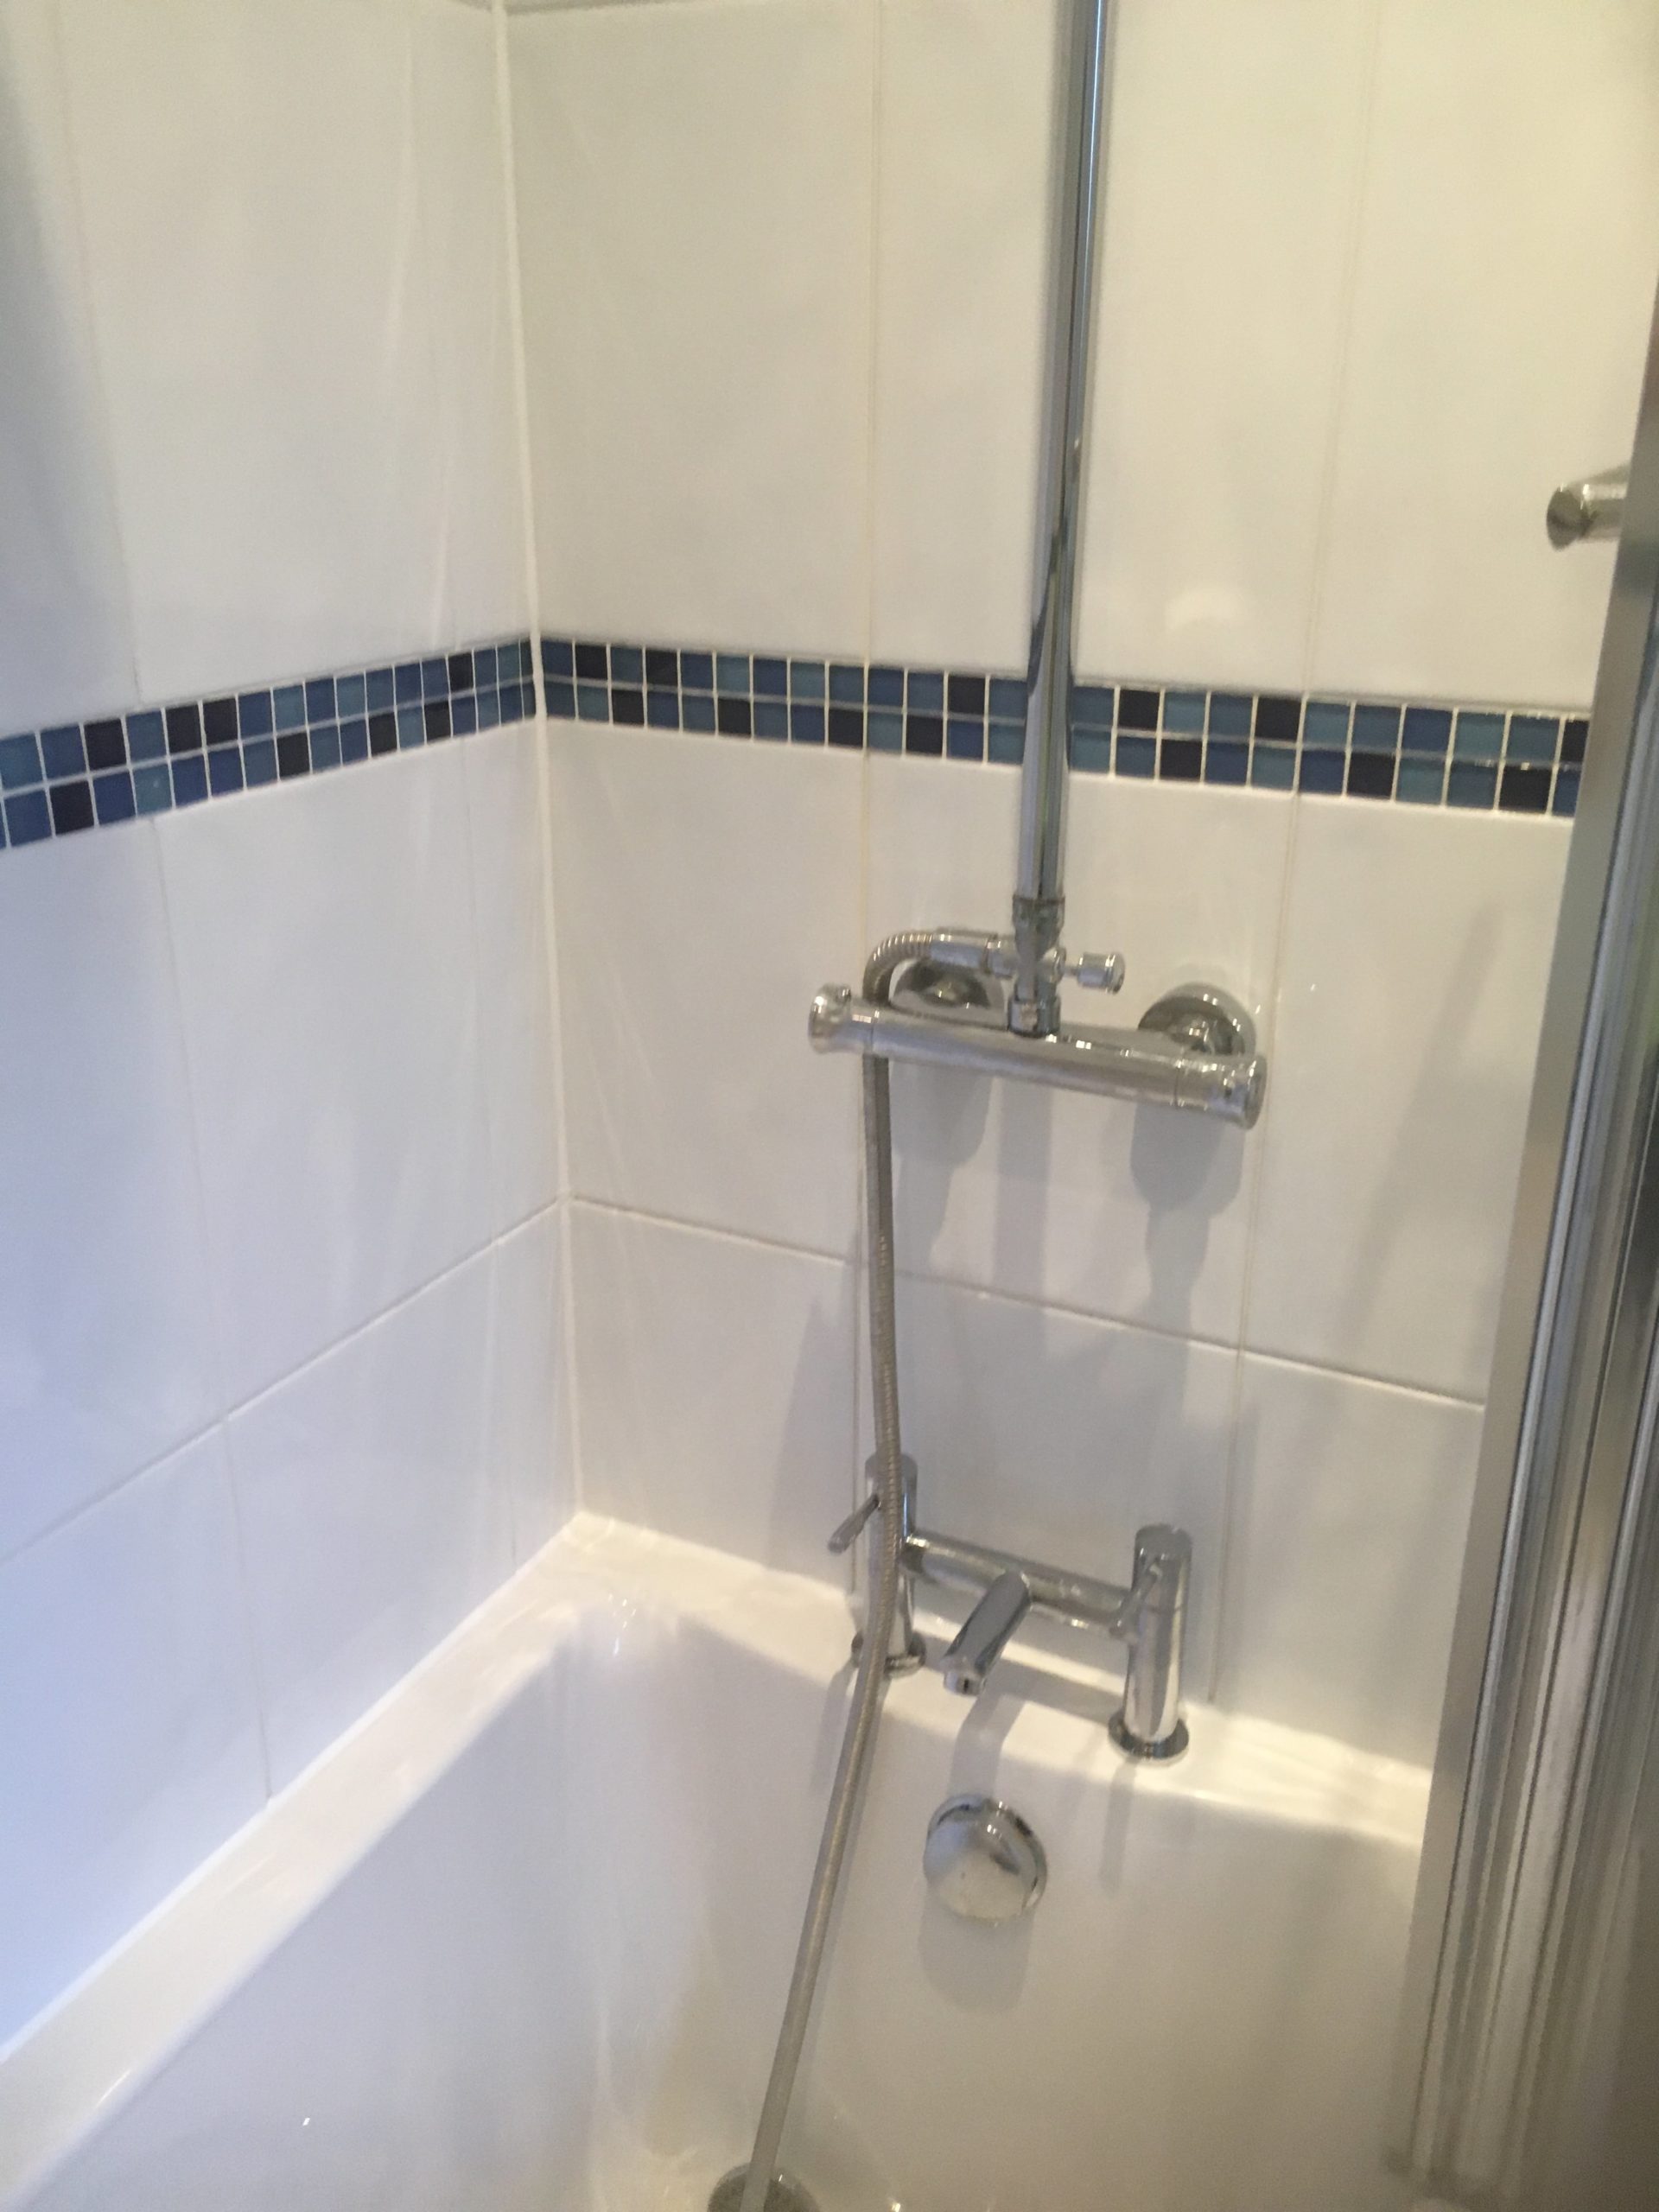
Bathroom Shower Tile After Cleaning Handforth


Source: Bathroom Tile Cleaning and Renovation Service in East Cheshire

To install bathroom tile on top of plywood, you’ll have to follow a series of steps. This process is not complicated, but you will need to be willing to do some work. Here are the basics of how to install bathroom tile on plywood.

What you’ll need
Tile
Adhesive
Trowel
Concrete board
Screws
Drill
Grout
Grout float
Bucket
Tile spacers
Tape measure
Wet saw
Chalk line

Step 1: Measure
Start out by measuring the room. Get the dimensions of the room and then multiply them together to get the square footage. You will then need to add 10 percent to that number so that you allow enough for waste.

Step 2: Prepare the Bathroom
Before installing, you will want to make sure that the bathroom is ready for installation. You need to remove the toilet from the room and take the baseboards off of the wall.

Step 3: Concrete Board
You are then going to need to install concrete board on top of the plywood. You cannot install tile directly to plywood because it is not dimensionally stable enough. If you put tile directly on top of plywood, it is going to start to chip and break within a very short period of time. To install the concrete board, you need to apply some of the tile adhesive to the back of it and then press it down against the plywood. Then you want to install screws into the concrete board in each one of the holes. Use your drill to make this job simpler.

Step 4: Center
You may want to center your tile in the bathroom. To do this, you need to measure to the center point of each wall with your tape measure. Then snap a chalk line in each direction. You can then start laying in the corner of the intersection of the chalk lines in the middle of the floor.

Step 5: Start Installing
At this point, you are ready to start installing the tile. Apply some of the adhesive to the floor with your trowel and smooth it out. Then press one of the tiles down into the adhesive firmly. Make sure that there are no gaps behind the tile. Then put tile spacers on the corners of the tile and put another tile directly up against those spacers. Put tile spacers around the second tile and then continue installing tiles in this manner.

Step 6: Cutting Tiles
When you get to a cabinet or the wall, you are going to need to make a cut. You can do this by measuring the appropriate size that you need and then making the cut with your wet saw.

Step 7: Grout
After you have installed all of the tile, you need to allow it to dry overnight. Then you should be ready to grout the next day. You can apply the grout with a grout float or a trowel. After you grout, you will need to use a sponge and a bucket of water to clean the grout off of the tops of the tiles.


Source: www.DoItYourself.com

Laying bathroom floor tile is an easy first-time tile project because bathrooms tend to be much smaller and less visible than a kitchen or foyer. If you are laying tile over a sub-floor, rather than a cement foundation, you should first lay cement board, which seals out moisture and helps the tile to adhere to the floor. Once you have purchased your tile and a complementary color of grout, you just need a few more supplies and inexpensive tools to tile a bathroom floor yourself.

THINGS YOU’LL NEED

  • Measuring tape
  • Cement board
  • Utility knife
  • Thin-set mortar
  • 2 large buckets
  • Notched trowel
  • Roofing nails
  • Hammer
  • Square
  • Chalk line
  • Tile
  • Tile cutter or wet saw
  • Tile spacers
  • Level
  • Large sponge
  • Grout
  • Grout float
  • Grout sealant
  • Knee pads

THE STEPS

Laying Cement Board

  1. Mix a batch of thin-set mortar with water in a bucket, according to the manufacturer directions. It should be thick, but not so thick that is doesn’t fall off a trowel. Don’t mix more thin-set than you can use within an hour, or it will begin to dry out.
  2. Spread a layer of thin-set on the sub-floor with the notched trowel.
  3. Cut the cement board to fit the space, if necessary, by scoring it with a utility knife. Lay the cement board over the thin-set.
  4. Pound in roofing nails along the edge to secure the backer board to the floor.
  5. Continue this process until the floor is covered in backer board.
  6. Apply a thin layer of thin-set mortar over the joints.
  7. Wait until the next day to begin laying tile.

Laying Bathroom Floor Tile

  1. Establish a straight vertical and horizontal reference line from the center of the room. If you simply start laying tile along a crooked wall, it will look really crooked by the time you reach the opposite wall.
    • Identify the most visible wall when you walk into the room. This is the wall with the longest area of continuous tile.
    • Determine a 90-degree angle from that wall, using a square, and snap a chalk line across the room.
    • Use the square again to mark a perfect 90-degree angle from that chalk line and snap another chalk line that’s perpendicular to the first one. Now you have two intersecting chalk lines as a reference to lay the first tile.
  2. Lay out a single horizontal and vertical row of tiles across the floor along the chalk reference lines. Shift the tiles, if needed, so any cuts that must be made by the wall are against the least noticeable wall. You also don’t want cut tiles at the entrance to the bathroom, so adjust the tiles so cuts are against the far wall.
  3. Snap additional chalk reference lines, once the tile layout is finalized.
  4. Set the first tile in the far corner of the room and work towards the doorway. You won’t want to step on the newly laid tile before the mortar has a chance to dry.
  5. Work on laying the tile in small sections at a time.
    • Mix up a small batch of thin-set mortar and spread a thin layer on the cement board with the notched trowel.
    • Lay several pieces of tile with tile spacers to establish even grout lines.
    • Firmly press the tile into the mortar so there are no air bubbles underneath.
    • Set a level across the top of the tiles to make sure they are perfectly flat.
  6. Cut tiles with a tile cutter or wet saw, if necessary, to fit along the wall. You may also need to make cuts for tiles that sit around toilets and other rounded objects in the floor.
  7. Allow the thin-set to dry for at least a day, or as recommended by the manufacturer, before grouting.

Grouting Bathroom Floor Tile

  1. Pull the tile spacers out from between the tiles before adding grout.
  2. Mix the sanded grout with water in a bucket, according to the manufacturer directions.
  3. Scoop some grout onto the file floor with a trowel, and then firmly press it into the grout lines with the grout float, working in small sections at a time.
  4. Remove the excess grout from the surface of the tile before it has a chance to dry.
    • Fill a second bucket with water and use it to wet the large sponge with rounded corners.
    • Wring out the sponge and then wipe over the tile so that you are moving at a diagonal to the grout lines. If you wipe parallel to the grout lines, you might gouge out some of the grout and leave an uneven surface.
    • Rinse the sponge in the bucket of water and repeat until all the grout is removed from the surface of the tile.
  5. Repeat this process until the entire floor is grouted.
  6. Wait at least 2 days for the grout to cure before sealing it.

TIPS

  • Purchase your tile all at once, accounting for at least 15 percent overage for cut tiles and breakage, because the dye lot can vary from shipment to shipment.
  • Wearing knee pads during tiling and grouting, which requires kneeling on a hard surface for long periods of time, protects your knees.
  • A sponge with rounded corners is best for removing grout from the surface of the tile, because a sponge with squared edges may gouge out some of the grout when you wipe across the grout lines.

WARNINGS

  • Expect the grout to appear much darker when applying it. If you aren’t sure the color is correct, dry a small area with a hair dryer before grouting the entire floor with the wrong color. It’s extremely difficult to remove grout once it’s dried.
  • Don’t add too much water to grout or it won’t harden as well. It should be about the consistency of thick batter.


Source: www.WikiHow.com

Recently I was asked to renovate the tile and grout of this windowless bathroom in a Beckenham flat which was not looking its best. The Ceramic tiles had become dull due to a build up of Limescale and the grout had become stained from shampoo dyes and mould. Without strong ventilation and regular cleaning most bathrooms can end up with these problems however with the right products and techniques they can be renovated as you will see below. Deep Cleaning Bathroom Tile and Grout My first

Read more…

To read more on this topic click here

An elderly couple from the Greater Manchester town of Eccles were in touch recently regarding their Ceramic Tiled Bathroom, they had a big problem with mould build-up due to a broken extractor fan and wanted it removing. Mould grows in humid conditions and with the extractor fan out of action it soon started to spread. If you have been reading my blog, you will have seen some of the bathroom transformations we have completed over the years, so I was confident we could resolve the problem

Read more…

click here for more information on this subject