Archive

Terracotta

Earlier this year I went to visit a property in Canterbury to look at restoring a Terracotta tiled floor. The floor was approximately 11m2 and made from the larger Saltillo type Terracotta tiles. It had been in situ for some time and being located in the hallway it was subject to the heavy foot traffic of a busy household.

Having taken a closer look at the Terracotta tiles I could see there were many high spots due to poor installation by the original tiler, on top of that it had then been sealed with linseed oil followed by a wax paste. Wax was traditionally used to seal Terracotta floors, but it scratches easily and can lead to a thick build-up. Since the introduction of modern sealers designed for the job, we don’t recommend wax treatments anymore.
Saltillo Terracotta Hallway Floor Before Renovation Canterbury Saltillo Terracotta Hallway Floor Before Renovation Canterbury

We discussed the process to renovate the floor, explaining that the best course of action would be to use milling pads to level the surface of the tiles which would improve the finish and remove the built-up wax. Once prepared in this way the floor would be sealed to protect it going forward. They were happy with my quotation and we agreed a date to return and complete the work.

Renovating a Terracotta Tiled Hallway Floor

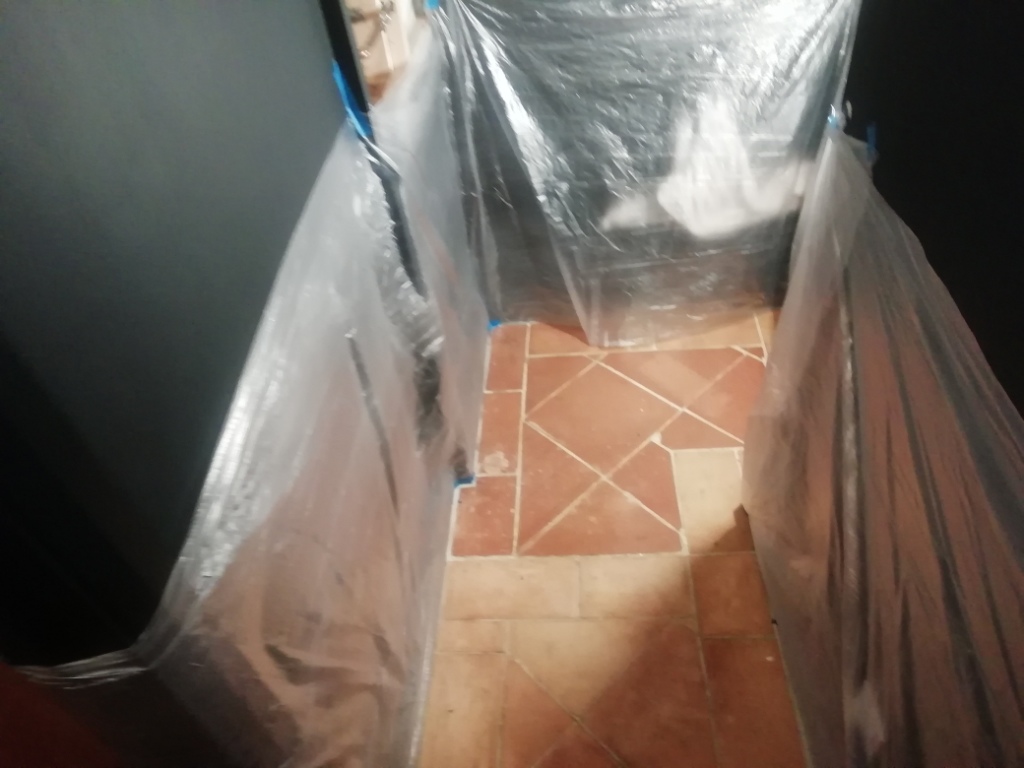
The use of Milling pads can generate a lot of slurry to our first task was to protect the surrounding areas using protective sheeting. The area was quite tight to work in, so we used the smaller six-inch milling pads which are encrusted with coarse industrial diamonds. The pads we fitted to a handheld buffer and worked over the tiles gradually increasing the pads from coarse to finer grits. The machine we use has a water feed that keeps the surface lubricated and this also helps to reduce the dust. The fine slurry generated using this process is rinsed off and extracted with a wet vacuum.

The next step was to remove the old wax the floor had been treated with a dilution of Tile Doctor Wax Away which is designed for exactly this purpose. Its applied to the floor and then scrubbed in using a slow speed rotary machine. Afterwards the floor is rinsed with water several times and the waste removed with the wet vacuum. By the time we had finished that day we could see a big improvement in the floor surface. After the final rinse the floor was left to dry off overnight.

Sealing a Terracotta Tiled Hallway Floor

I came back the following day and using the moisture meter checked that the floor was dry. It was well within the accepted parameters, so I was ready to apply the seal.

To seal the Terracotta, I had selected to use Tile Doctor Colour Grow, this is a modern durable sealer that provides long lasting protection and ideal for busy hallways. Colour grow also also enhances the natural red and orange colours in the Terracotta leaving a nice subtle finish. Three coats of Tile Doctor Colour Grow were applied.

Saltillo Terracotta Hallway Floor After Renovation Canterbury Saltillo Terracotta Hallway Floor After Renovation Canterbury

The photographs I took don’t show the difference in the floor that well, however my customer was very happy with the improvement in the floor and glad that the potential trip hazard has been resolved.


Source: Saltillo Terracotta Tile Floor Cleaning, Renovation and Sealing service in East Kent

I was asked to visit a property in the old Yorkshire village of Bramhope to view a Terracotta conservatory floor. The owners of the property been recently had the floor laid and were unhappy with its appearance. The Terracotta tiles looked faded and washed out and did not have the finish they were expecting; they were also finding it difficult to clean.

I viewed the floor and went through with them what the tiler had done. Apparently, he started ok by giving each tile two coats of linseed oil which is a traditional approach but not something I would recommend these days. He then laid the floor and grouted it and told the customer that it didn’t need further sealing and that a good wash the next day would get rid of the grout and the dull appearance of the floor. Unfortunately, despite the customer washing the floor nothing he could do improved the appearance of the tiles and they remained dull and un-inviting.

Terracotta Tiled Conservatory Floor Before Cleaning

I was asked my opinion and having come from a tiling background of many years I can tell you his advice was completely wrong. Linseed oil is like a pre-seal so even touching it with greasy or dirty hands will permanently stain the tile so now grout was stuck in the linseed oil ruining the appearance of the terracotta. To clean up the tile and give it the appearance it deserved I would have to remove the grout haze and then seal with a more suitable product. The client was relieved that the floor could be salvaged and was happy to go ahead with my quote.

Cleaning a Terracotta Tiled Conservatory Floor

To remove the grout haze, I applied a 400-grit coarse diamond burnishing pad to the floor which was run over the tiles with a dilution of Tile Doctor Grout Clean-Up. The acidic nature of Tile Doctor Grout Clean-up combined with the abrasive properties of the diamond pad dealt with the unwanted surface grout and helped close the pores of the tile improving its appearance.

After thoroughly rinsing with water and extracting the soil with a wet vacuum the floor looked immediately better. The floor was inspected, and any problem areas retreated using the same process until I was happy with the floor.

Sealing a Terracotta Tiled Conservatory Floor

I left the floor to dry out for two days and then returned to seal with Tile Doctor Seal and Go which is ideal for Terracotta and being a water-based product, it doesn’t leave a smell as it dries. Seal and Go is a specially formulated water-based blend of acrylic polymers that provides both a stain resistant surface seal and a durable low-sheen finish. It restored the natural colour of the terracotta and gave the floor the lovely sheen that the customer originally wanted.

Terracotta Tiled Conservatory Floor After Cleaning

The floor now looks as it should. The client was really pleased with the renovation, the conservatory is now a pleasure to use!


Source: Terracotta Tile Cleaning and Sealing Service in Yorkshire

This Terracotta tiled floor was installed in the kitchen of a cottage in the small village of Maidford near Towcester. The tiles were not looking their best and the owner of the property realised it was time to do something about it and contacted Tile Doctor to have the floor stripped and resealed. Stripping and Sealing tile and stone floors is our bread and butter so I was more than happy to pop round and survey the floor which was approximately 9m2.

The grout had darkened with dirt and the previous tile sealer was failing so dirt was now getting ingrained in the Terracotta making it difficult to clean in places and leading to a patchy appearance. We discussed the work involved, my quote was accepted, and a date agreed for me to return and complete the work which would take two days, one to clean and one to seal.

Terracotta Tiled Kitchen Floor Before Cleaning Maidford

Stripping Terracotta Kitchen Floor Tiles

After tidying up the Kitchen and removing the kickboards from underneath the kitchen units I set about working on cleaning and stripping the Terracotta floor of old sealers. To start I tested a small area with a strong dilution of Tile Doctor Wax Away. Wax was quite often used on Terracotta so I figured this product would be a good place to start. My suspicions were proved correct, and I found this to be the best product for removing the many layers of sealant on the floor. Wax Away is a new alkaline product by Tile Doctor and ideal for cleaning clay-based tiles such as Terracotta.

Terracotta Tiled Kitchen Floor During Cleaning Maidford

With my sights set on the rest of the floor Wax Away was scrubbed into the tile using a 17” rotary floor scrubbing machine and a black scrubbing pad running on a slow speed which helps to reduce splashing. This activity soon brought the dirt off the floor and the soiled cleaning solution was removed using a wet vacuum and the floor was rinsed down with clean water. The cleaning process was repeated a couple of times until I was happy with the floor, a stiff hand brush was then used along the grout lines with a dilution of Tile Doctor Pro-Clean to clean up the grout.

Terracotta Tiled Kitchen Floor During Cleaning Maidford

After rinsing and extracting the floor again the floor was inspected, and I noticed there were a few stubborn paint splashes on the tiles. I managed to remove these and these by spot treating the affected area with Tile Doctor Remove and Go and a steamer to lift the stain out of the clay tile. Once happy the floor was clean it was given a thorough rinse to neutralise it and remove any trace of cleaning products and then left it to dry.

Terracotta Tiled Kitchen Floor After Cleaning Maidford

Sealing Terracotta Floor Tiles

I allowed the floor to dry for several days before returning to seal the Terracotta using numerous coats of Tile Doctor Seal and Go which is an ideal sealer for Terracotta and provides durable stain protection together with a low sheen finish. Terracotta is by its nature very porous and so it’s not unknown for it to take up to nine coats of sealer, which can take some time to apply as like paint you have to wait until it’s dry before it will take the next coat.

Terracotta Tiled Kitchen Floor During Sealing Maidford

The customer was so impressed by the results I achieved in their kitchen they decided to go ahead and book me in to carry out this process throughout the whole of the ground floor which included lounge, study and hallway.

Terracotta Tiled Kitchen Floor After Sealing Maidford


Source: Terracotta Tile Cleaning and Sealing Service in Maidford, Northamptonshire

A customer in Redditch had recently had a new kitchen fitted and prior to that had tried to seal the Mexican Terracotta tiled floor themselves, however they were not happy with the results, so they contacted Tile Doctor to see if an improvement could be achieved. The sealer they used was matt which didn’t show off the Terracotta at its best and the tile and especially the grout were not as clean as they could have been. Getting the tile and grout clean before sealing is essential otherwise you end up sealing in the dirt.

Mexican Terracotta Tiles Before Grout Cleaning Redditch Mexican Terracotta Tiles Before Grout Cleaning Redditch

To get the best from the floor I recommended stripping off the sealer, giving the tile and grout a deep clean and then resealing with a satin sealer. The customer agreed and keen to get his new kitchen looking its best booked me in to do the work.

Mexican Terracotta Tiles Before Resealing Redditch

Cleaning Original Victorian and Mexican Terracotta Tiles

My first tasks was to protect the new kitchen units from splashing with plastic sheeting and by removing the kick boards. Once done I began the process of removing the existing sealer by applying Tile Doctor Remove and Go which as the name implies is a strong coatings remover that safe to use on Tile and Stone. The product was dilated with water, applied to the tile and grout and left to soak in for about ten minutes. The floor area between the kitchen units was quite tight so on this occasion I decided to scrub the tiles with a deck brush and hand brush as opposed to using a rotary machine fitted with a scrubbing pad. The Remove and Go did the job and the sealer was removed and the floor rinsed off with water to reveal the original tiles.

Mexican Terracotta Tiles During Stripping Redditch Mexican Terracotta Tiles During Stripping Redditch

The next step was to give the Terracotta tile and grout a deep clean by scrubbing in a medium dilution of Tile Doctor Pro-Clean. Mexican Terracotta can be difficult to clean due to the makeup of the tile, but the Pro-Clean scrubbed in with the brushes I used earlier worked well. The now soiled cleaning solution was rinsed off with water and then extracted using a wet vacuum.

The customer had laid some new tiles to fit in with the new units but asked me to grout them so with time to spare before leaving for the day I grouted them in with a flexible grout and polished off any grout smears. It’s important that tiles are dry before sealing so the floor was then left for two days so it could dry out.

Sealing a Mexican Terracotta Floor

Upon my returned to seal the tiles I first checked with a damp meter that they had indeed dried. All was well, so I began the process of applying Seal and Go which is a water-based sealer from the Tile Doctor range that leaves the satin finish the customer wanted, also being water based it doesn’t leave a smell as it dries. Mexican Terracotta is notoriously very porous, so numerous coats of seal are required and in fact this floor needed eleven coats. I applied a few more coats to the new tiles so they would blend in better with the existing tiles.

Mexican Terracotta Tiles After Grout Cleaning Redditch Mexican Terracotta Tiles After Grout Cleaning Redditch

The customer was very pleased with the results and I left them with a bottle of Neutral Tile Cleaner to help maintain the tiles appearance going forward.
 
 
Source: Terracotta Tile Cleaning, Renovation and Maintenance Service in Birmingham

It’s very surprising how often I hear from home owners who are considering completely replacing tiled floors that can be easily be salvaged. While some people might believe that replacement is cheaper and quicker than cleaning, this is emphatically not true in most situations.

Thankfully, one of my recent customers, who lives in Kingston Upon Thames had been persuaded by her husband not to completely strip out the original Terracotta tiles in their kitchen. While the couple had just had new kitchen units installed, it seemed unnecessary to completely replace the Terracotta floor tiles even though they certainly needed a deep clean.

Terracotta Floor Tiles Before Cleaning Kingston on Thames

Instead, they contacted their local Tile Doctor to rejuvenated the tiles to complement the new kitchen design.

Cleaning Original Terracotta Kitchen Tiles

Before beginning, I covered all the new kitchen units with protective sheeting to prevent them from encountering water and splashes from the cleaning products. I could see that the tiles had been left unsealed for many years and this had allowed dirt and general muck to become deeply ingrained.

To clean the tiles, I applied a covering of our strong alkaline-based cleaner, known as Tile Doctor Pro-Clean, and left it dwell for a short period. I then attached a coarse, 200-grit diamond encrusted burnishing pad to my buffing machine and began working the product into the tiles. The burnishing pad milled away the dirty top layer of the tiles. Contrary to what some might believe, this doesn’t harm the tiles in any way, but instead polishes them.

Any old sealer and dirt that the buffing machine could not reach in the corners of the room was removed by hand using diamond encrusted burnishing blocks. The burnishing process does, in fact, make quite a mess, so I promptly rinsed off the resulting slurry with more water and a wet vacuum to clear the area and leave it clean and ready to be dried.

Sealing Original Terracotta Kitchen Tiles

A lot of water was used during the cleaning process, so I had to leave the property for 48 hours to let the tiles dry completely. Returning to the property after those two days, I sealed the tiles using six coats of Tile Doctor Seal and Go. Following years of next to no protection, the floor desperately needed an effective sealer to put new life in the Terracotta and Seal and Go does that in spades by adding a lovely sheen to the tile.

Terracotta Floor Tiles After Cleaning Kingston on Thames

The photo above shows the amazing difference made by cleaning the floor instead of choosing to replace. The customer’s testimonial speaks for itself:

“Excellent service and we are delighted with the work. Would definitely use Rupert again.”
 
 
Source: Terracotta Tiled Floor Cleaning and Restoration Service in West-Surrey

Terracotta, terra cotta or terra-cotta meaning baked earth is a clay based tile which can be glazed or unglazed and were traditionally hand-made. Because of the material used to produce the tiles they are very porous and the firing process creates a lot of variation of colour not just between each tile but within each individual tile. The two main types of terracotta tile are Spanish and Mexican, or Saltillo, and have different colour variations and characteristics but are essentially treated in the same way. There are even some manufacturers that offer paw prints in tiles, although they cost extra!

Of course, Terracotta is also commonly used as a material for tiled floors due to the warming and homely characteristics of the stone, associated with old country living. Indeed, a Terracotta tiled floor can be an asset to any home, but only if it is routinely maintained.

I recently visited a property in Lympstone, a small picturesque harbour village in East Devon in the area of Woodbury, to tend to a lovely Terracotta tiled floor that had been installed in an open-plan kitchen/diner. The tiles had gotten very dirty over its fifteen-year life and the current owners were struggling to clean it and had spent a long time scrubbing the floor with very little reward.

Once on-site I conducted a small test clean on the floor which was very successful and gave the customers confidence in going forward. Happy to give me the work we agreed a date and I came back a few weeks later.

Terracotta Tiled Floor in Lympstone Before Cleaning

Deep Cleaning Terracotta Tiles

Because of the undulation and texture in the tiles, the floor was treated using Tile Doctor’s Oxy-Gel, a powerful and fast-acting alkaline stripper/degreaser which is ideal for use on vertical surface and uneven tiles such as terracotta because the gel doesn’t run off the higher areas and pool in the lower areas. The product also has a short dwell time which enabled the entire floor to be cleaned in a day.

The Oxy Gel was scrubbed into the tile and grout with the aid of a stiff bristled monster brush fitter to rotary scrubbing machine. Once the cleaning process had been completed, I extracted the dirty cleaning solution using a wet vacuum and then re-treated any stubborn areas.

Following the cleaning the whole floor was given a thorough rinse to remove any trace of cleaning product. This required a lot more water and brushing than usual because of the tiles acting more like a sponge because they weren’t sealed. Again, a wet vacuum was used to extract the water and get the floor as dry as possible.

Sealing Terracotta Tiles

Because Terracotta is a very porous tile I left the floor for five days to ensure it would be dry enough when I returned to seal it. Tiles need to be dry before sealing as any excess moisture and damp issues can upset the performance of the sealer.

I tested the floor for dampness on my return and found it had dried well and was ready to be sealed. This allowed me to proceed with sealing the tiles using Tile Doctor Seal and Go, which is an acrylic, topical sealer. It provides a both a stain resistant surface seal and a durable low-sheen satin finish.

Being the product is water-based there no smell is given off by the sealer as it dries, and since the Terracotta is very porous I ended up using nine coats of sealer which is not uncommon on this type of tile. Once fully sealed the floor will not absorb water and so is easier to clean and much more resistant to staining.

Terracotta Tiled Floor in Lympstone After Cleaning

As you can see from the above photo, the condition of the floor was massively improved. What was a very dull and stained Terracotta floor is now colourful and clean. Certainly, the customer was really pleased with the outcome and left the following feedback:

“Stuart was punctual to the minute and thoroughly friendly and professional at all times.
We are very pleased with the floor and highly recommend him. Ryan S.”
 
 
Source: Terracotta Tile Cleaning and Sealing Service in Devon

Terracotta tiles are made all over the world and not surprisingly are very popular around the Mediterranean which is where these Catalan Terracotta Tiles were imported from.

Catalan Terracotta Before Cleaning Halifax Farmhouse Catalan Terracotta Before Cleaning Halifax Farmhouse

They had been installed in a large former farmhouse outside of Halifax in West Yorkshire about twenty years earlier and had never really been subject to an effective maintenance regime. They were now looking very tired and dirty indeed and well overdue a deep clean and reseal.

Cleaning Spanish Terracotta Tiles

I cleaned the floor using a 1:3 dilution of Tile Doctor Pro-Clean with water which is an effective alkaline Tile and Grout cleaner that will clean and strip old sealers from tiles when used in a strong dilution such as on this occasion. I left it to soak into the tile for about ten minutes before scrubbing it in with a black scrubbing pad fitted to a rotary floor machine. This process got most of the dirt off but the pad didn’t have good contact with all the tiles as many were convex in shape as Catalan tiles often are. This became apparent after rinsing the soiled cleaning solution off the floor with more water and extracting the soil with a wet vacuum.

To make sure all the missed areas were cleaned I applied more Pro-Clean and scrubbed them by hand with a scrubbing brush. I also took the opportunity to clean the grout as well which was a long job as the tiles were only 6 inches square so there was a lot of grout to do.
The little white tile inserts between the Terracotta tiles are called Tacos and they came up particularly well during cleaning.

Catalan Terracotta During Cleaning Halifax Farmhouse

Sealing Spanish Terracotta Tiles

Once the clean had been completed I left the tiles to dry off for two days before returning to seal them. It’s important that the tiles are bone dry before applying a sealer as any moisture can cause unexpected results.

Upon my return to the property I ran some quick damp tests, which revealed the tiles were ready to be sealed. I then applied four coats of Tile Doctor Seal and Go, our topical sealer which provides a satin finish and really improves the look of Terracotta floor.

Catalan Terracotta After Cleaning Halifax Farmhouse Catalan Terracotta After Cleaning Halifax Farmhouse

My customer was very happy with the finished result and I think you will agree the floor looks so much brighter and healthier.
 
 
Source: Terracotta Tile and Grout Cleaning and Restoration in Yorkshire

This post comes from a job I did for a customer in who lives in the town of Runcorn on the south bank of the River Mersey. The request was to restore the Terracotta floor tiles in the kitchen of a property which dated back to 1773 and still had all its original features inside and out. You can see from the photograph below that the tile and grout were looking very dull and well overdue a deep clean and seal.

Old Terracotta Kitchen Floor Before Cleaning Runcorn

Deep Cleaning a Terracotta Tiled Kitchen Floor

To clean the floor, I soaked the floor in a strong dilution of Tile Doctor Remove and Go which is a strong stripping and cleaning solution which removes sealers and also draws out ingrained stains and also the heavy grease build up that was present around the cooker.

After twenty to thirty minutes the solution was worked into the tiles using a black scrubbing pad fitted to a rotary machine. The soiled solution was then removed with a wet vacuum and this was followed by scrubbing the grout lines with more Remove and Go and a grout brush until they were clean. The whole floor was then rinsed with water to remove any soil and trace of cleaning product. The water was then extracted using the wet vacuum. The floor was then checked to make sure it was as clean as it could be and stubborn areas spot treated.

Once I was happy the floor was clean it became apparent that some of the grout was loose and would need replacing so I took care of that using a matching grout before calling it a day and leaving the floor to dry out overnight.

Sealing a Terracotta Tiled Kitchen Floor

We returned next morning and tested the tiles with a damp meter making sure it was dry before we could seal it. To seal the floor, I used Tile Doctor Seal and Go which adds a nice sheen to the tiles and works really well on Terracotta.

Old Terracotta Kitchen Floor After Cleaning Runcorn

I took some time to complete though as due to the porosity of the clay it required eight coats to fully seal the tiles. You have to wait between coats to allow them to dry however I was able to speed up the drying process though using an air blower.
 
 
Source: Terracotta Tile and Grout Cleaning Service in Cheshire

Terracotta is an interesting type of stone manufactured using a variety of techniques dependant on the country of origin which leads to a number of differences such as Spanish Terracotta being less porous than its Mexican counterpart: the former is semi-hand made and finished in a factory kiln, while the latter is completely handmade. Spanish Terracotta is therefore a lot less than porous and ultimately, of a higher quality.

Spanish Terracotta Hallway Before Cleaning Halifax

But despite the Spanish Terracotta being less porous, and therefore being less prone to ingrained dirt, it still, like any other stone, needs regular maintenance to keep it looking smart. In the tiling trade, we quite often refer to this as a good old fashioned ‘Clean and Seal’ and this is exactly what was requested by this property owner in Halifax, for their Spanish Terracotta tiled floors in the kitchen and adjacent hallway.

Cleaning Spanish Terracotta Tiles

I cleaned both sets of Terracotta tiles using the same process, which involved the application of our reliable alkaline cleaner known as Tile a Doctor Pro Clean, diluted with five parts of warm water. Once the solution had been left to dwell for a short period, it was scrubbed into the tiles to remove all dust, dirt, and general muck. This created a slurry of cleaning residue, which I promptly soaked up using a wet vac. A wet vac machine is an essential tool when it comes to cleaning porous tiles since, unlike a traditional mop and bucket, it sucks the excess trapped dirt out of the clay and thus provides a superior clean.

Following this, I applied a small amount of our heavy duty remover, known as Tile Doctor Remove & Go, to deal with some of the more stubborn stains and paint splashes, before rinsing with clean water and wet vaxing in a similar fashion to before.

Spanish Terracotta Kitchen After Cleaning Halifax

Sealing Spanish Terracotta Tiles

Once the clean had been completed I left the tiles to dry completely. This can take 12 to 24 hours depending on numerous factors including whether a Damp proof Membrane and underfloor heating has been installed which can really help reduce drying times. Letting the tiles dry completely before sealing is paramount as moisture can cloud the sealer and affect its performance.

Upon my return to the property I ran some quick damp tests, which revealed the tiles were ready to be sealed. I then applied several coats of Tile Doctor Seal and Go, our topical sealer which provides a satin finish and accentuates colour. A new coat of this product is recommended every six months on Terracotta to ensure the continuous protection of the tiles’ soft clay particles.

Spanish Terracotta Hallway After Cleaning and Sealing Halifax

My customer was extremely pleased with her refreshed Terracotta tiles. It goes to show what a big difference a bit of regular maintenance can make. I advised the customer that an everyday cleaner called Tile Doctor pH Neutral cleaner can also be used regularly to keep the tiles looking great without damaging the sealer.

Spanish Terracotta Kitchen After Cleaning and Sealing Halifax
 
 
Source: Terracotta Tile and Grout Cleaning and Sealing Service in Yorkshire

Having an effective sealer in place is essential for ensuring the long term condition of tiled floors in fact a lack of sealer can make cleaning the tiles exceptionally difficult as the sealer prevents dirt becoming ingrained in the tile.

Terracotta Floor Before Cleaning and Sealing in Matlock

This property owner, living in the former spa town of Matlock in Derbyshire, was experiencing problems with their Terracotta tiled kitchen floor since they had applied some kind of wax to act as a sealer, and this had worn off within a few weeks. After this happened the tiles were not sealed again, making cleaning a big problem. Terracotta is a highly porous stone and thus easily soaks in spillages and stains, and allows dirt to become very easily trapped.

Terracotta Floor Before Cleaning and Sealing in Matlock

In this situation, the property owner resolved to contact me about some professional maintenance. I suggested that the tiles would need a deep clean followed by the application of a fresh, high quality sealer. The work was agreed on and I made my way down to the property the following week.

Cleaning a Dirty Terracotta Tiled Floor

When I arrived at the property and saw the tiles first hand it became clear that a professional clean had been in need for a long time: greasy looking stains were particularly prevalent and covered large areas of the kitchen floor.

To remove I mixed a strong solution of Tile Doctor Pro Clean, which is a multi-purpose, high-alkaline cleaner, stripper and degreaser, and, working in small areas, applied it to the floor. Working in small sections was important because the stone is very porous and quickly soaked in any product laid down. I scrubbed the cleaner into the stone using a rotary machine fitted with a black scrubbing pad, with the dirt and stains coming away nicely. Pro Clean is highly versatile and can be used for similar cleaning purposes on most types of natural stone floor.

After cleaning each section, I quickly removed the excess dirty water and chemicals with my wet vax machine. Once the whole floor had been cleaned I rinsed it several times with fresh water just to make sure all cleaning chemicals were gone. I then left the floor to dry completely for 36 hours.

Sealing a Terracotta Tiled Floor

When I returned to the property, I conducted several damp tests to check for any areas of the floor that needed further drying. As is almost always the case, there were a few areas that remained slightly damp, and I set about speeding the drying process along using my heat gun. In fact, it actually took me more than three hours to get the floor completely dry, but this was worth the effort as even the slightest excess moisture can damage the performance of the sealer.

Once the floor was finally dried I began sealing the floor with one coat of Tile a Doctor Colour Grow sealer. Colour Grow is an impregnating sealer that penetrates deep into the pores of the stone, thus acting as a shield against ingrained dirt, and also raises the colour of the tiles to provide an aesthetically appealing appearance. sealer. After sealing with Colour Grow, I left the floor to dry for couple of hours and then applied six coats of Tile Doctor Seal & Go, which is a topical sealer that builds up durable protection on the surface of the tiles.

Terracotta Floor After Cleaning and Sealing in Matlock

The combination of through cleaning and the application of not one, but two high quality sealers really did wonders for the appearance of these Terracotta tiles. Looking at the final results you wouldn’t have believed they had been without a proper clean and seal for so long! Needless to say the customer was exceptionally pleased and will surely be able to keep her floor looking great for a long time to come.
 
 
Source: Terracotta Tile and Grout Cleaning Service in Derbyshire